How to SSH Connect to Instances
The platform provides two methods for SSH connection operations. You can choose the appropriate method based on your actual needs.
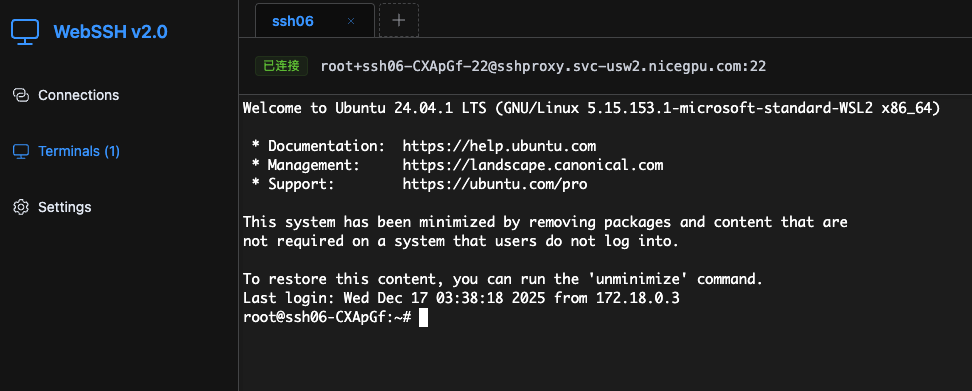
Method 1: Use Web SSH Feature (Recommended)
The platform provides a Web SSH feature that allows you to perform SSH operations directly through your browser without installing any client software. This method is recommended.
Steps
- In the instance management interface, locate the instance you want to connect to
-
Click the SSH button in the instance action bar

-
You can directly operate in the pop-up Web SSH window
Features
- ✅ No need to install any client software
- ✅ Support copy and paste operations
- ✅ Support file upload and download
Method 2: Use SSH Client
If you need to use a local SSH client (such as Terminal, PuTTY, Xshell, etc.) for connection, you can refer to the following methods.
Prerequisites
- SSH client tool is installed
- SSH connection information for the instance is obtained
1. Connect Using Password
Step 1: Get Connection Information
View the SSH connection address and password information in the Instance interface.

Step 2: Connection Format
SSH connection address format: {User Name}+{Instance Name}-22@sshproxy.{Region Domain}.nicegpu.com
Step 3: Execute Connection Command
# Example: Connect to an instance in the usw2 region
ssh [email protected]
Step 4: Enter Password
Enter the password displayed on the interface after connection to complete authentication.
Change Password
You can also click the Reset Password button to set your own password.
Note
After changing the password, it will take approximately 1 minute to take effect. Please wait before trying to connect again.
2. SSH Key-Based Authentication
Using SSH key authentication improves security and convenience, eliminating the need to enter a password each time.
Step 1: Generate SSH Key Pair (if not already generated)
If you don't have an SSH key pair locally yet, you can generate one using the following commands:
# Generate SSH key pair (using default path and filename)
ssh-keygen -t rsa -b 4096

# Or specify a key filename
ssh-keygen -t rsa -b 4096 -f ~/.ssh/nicegpu_key
After generation, the public key file is usually located at ~/.ssh/id_rsa.pub (or the path you specified).
Step 2: Upload SSH Public Key
Upload your SSH public key to the instance through the Web SSH feature:
- Open the Web SSH interface
- Find the SSH key management function
- Upload the public key content (contents of the
~/.ssh/id_rsa.pubfile) to the instance
Step 3: Install socat Tool
Install the socat tool locally (used for SSH proxy connection):
macOS:
brew install socat
Linux (Ubuntu/Debian):
sudo apt-get update && sudo apt-get install -y socat
Linux (CentOS/RHEL):
sudo yum install -y socat
Step 4: Configure SSH Client
Add the following configuration to your local ~/.ssh/config file:
# NiceGPU Region usw2
Host *.svc-usw2.nicegpu.com
    ProxyCommand socat - PROXY:35.206.104.187:%h:%p,proxyport=5002

# NiceGPU Region cnw1
Host *.svc-cnw1.nicegpu.com
    ProxyCommand socat - PROXY:35.220.235.162:%h:%p,proxyport=5002
Step 5: Connect to Instance
After configuration, connect directly using the following format:
# Connection format: ssh {User Name}@{Instance Name}.{Region Domain}.nicegpu.com
ssh [email protected]
The connection will automatically use the uploaded SSH key for authentication without requiring a password.
Frequently Asked Questions
Q: Connection shows "Connection refused" or "Connection timed out"
A: Please check:
- Whether the instance is in running state
- Whether the network connection is normal
- Whether the SSH connection address is correct
Q: Key authentication shows "Permission denied"
A: Please check:
- Whether the SSH public key is correctly uploaded to the instance
- Whether the
~/.ssh/configfile permissions are correct (should be 600) - Whether the private key file permissions are correct (should be 600)
Q: Key authentication shows "Authentication failed"
A: Please check:
- Whether the password you entered is correct
- If you just reset your password, wait 1 minute before trying the new password
Q: How to view my SSH public key content?
A: Use the following command to view:
cat ~/.ssh/id_rsa.pub